
The Ultimate Beef Fajita Skillet: Easy Restaurant-Style Recipe
Introduction
This Beef Fajita Skillet is an easy one pan dinner packed with juicy steak, colorful peppers, and bold Tex Mex flavors. Whether you’re cooking for your family or entertaining guests, this Beef Fajita Skillet delivers restaurant quality results at home.
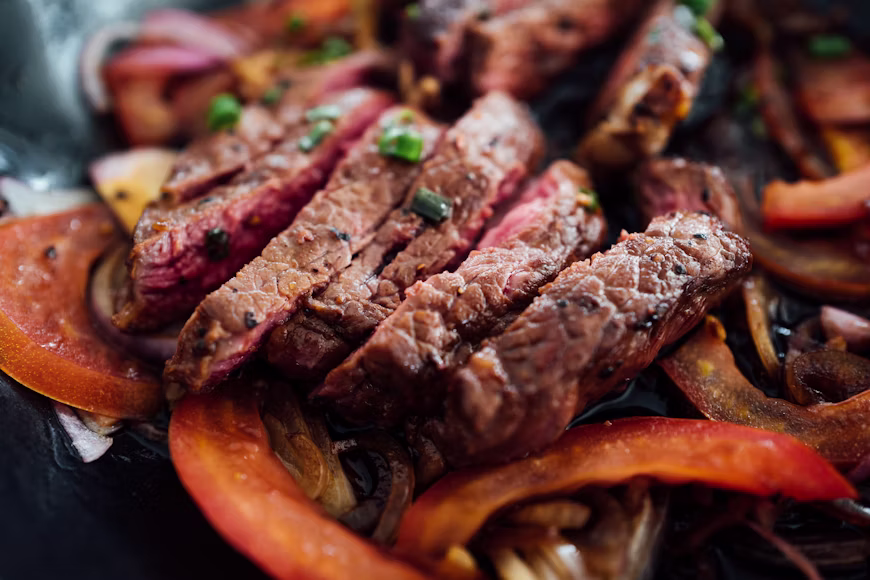
Nothing matches the sensory experience of a smoking hot, sizzling cast-iron skillet (sartenada) piled high with tender strips of marinated beef, surrounded by caramelized bell peppers and charred onions radiating authentic Latin aromas. Fajitas are not just a quick weeknight dinner; they are an interactive culinary event that brings family and friends together around the dinner table.
If you have ever wondered how top-tier Mexican restaurants achieve that deeply smoky, charred exterior while keeping the steak incredibly juicy and melt-in-your-mouth tender, you are in the right place. The secret does not lie in overly complicated ingredients, but rather in precise cooking techniques, using the right pan, and mastering the ultimate flavor-infusing marinade.
In this comprehensive guide, we will dive deep into every single detail required to master this dish at home: from selecting the ideal cut of beef and mastering the perfect slicing technique, to executing high-heat searing and arranging a flawless presentation with classic side dishes.
Part 1: The Science of Meat Selection and Prep
Before we even turn on the stove, we must talk about the star of the show: the beef. The success of your fajitas depends heavily on the cut you choose and how you prep it.
1. The Best Cuts of Beef for Fajitas
Traditional Tex-Mex and Mexican kitchens rely primarily on two cuts of beef that boast robust, beefy flavor and an open grain structure perfect for trapping marinades:
-
Skirt Steak: This is the absolute traditional and original cut used for fajitas. Located near the plate, it has prominent, long muscle fibers and excellent intramuscular fat marbling. This gives it an intensely deep, savory flavor.
-
Flank Steak: A fantastic, widely available alternative. It is leaner, wider, and thicker than skirt steak. When marinated properly and seared quickly over intense heat, it becomes exceptionally tender and yields beautifully clean slices.
2. The Golden Rule of Slicing: “Against the Grain”
If you cook the steak perfectly but slice it incorrectly, you will end up with tough, rubbery, and stringy pieces that are difficult to chew.
-
What does “against the grain” mean? Before slicing, look closely at the raw or cooked meat. You will see distinct muscle fibers running like parallel lines across the steak. You must position your knife perpendicular (at a 90-degree angle) to these lines and slice across them.
-
Why it works: Slicing against the grain cuts through the long, tough muscle fibers, shortening them into tiny segments. This structural change ensures that every single bite breaks apart effortlessly in your mouth, resulting in a buttery, tender texture.
Part 2: Ingredients and Exact Specifications
To prepare a feast that generously serves 4 to 6 people, gather the following ingredients. We have divided them into the core structural elements and the essential marinade components.
1. The Beef and Vegetables
-
1.5 lbs (Approx. 700g): Flank steak or Skirt steak, trimmed of excess hard fat and sliced into thin strips against the grain.
-
2 large: Vibrant bell peppers. For the best visual appeal and flavor balance, mix colors (red, green, and yellow). Slice them into medium-thick strips.
-
1 large: Onion. White onions offer a crisp, traditional sweetness when caramelized, while red onions provide a sharper bite and stunning color. Slice into uniform wedges or strips.
-
2 tbsp: High-quality olive oil or a high-smoke-point vegetable oil (such as avocado, corn, or sunflower oil), divided into separate tablespoons for cooking.
2. The Marinade: The Legendary Flavor Base
This marinade does more than just inject deep flavor; it acts as a chemical tenderizer. The citric acid from the fresh lime juice breaks down tough surface proteins, locking in moisture. Whisk these ingredients together in a bowl:
-
3 tbsp: Olive oil (acts as a carrier for fat-soluble spices and coats the meat evenly).
-
Juice of 2 fresh limes: Yielding about 3 tablespoons of highly acidic, bright citrus juice.
-
2 cloves: Fresh garlic, minced or finely grated into a smooth paste.
-
1 tsp: Ground cumin (the warm, earthy, and essential backbone spice of Mexican cuisine).
-
1 tsp: Chili powder (adds a deep, dark chili warmth without overpowering heat).
-
1 tsp: Smoked paprika (essential for mimicking that authentic, open-flame outdoor grill flavor).
-
1/2 tsp: Dried Mexican oregano (crushed between your palms to activate the aromatic oils).
-
1 tsp: Fine sea salt.
-
1/2 tsp: Freshly cracked black pepper.
Part 3: Step-by-Step Culinary Execution
The cooking phase is where the magic happens. High heat and timing are absolutely critical. Follow these four distinct phases precisely:
[Phase 1: Marinate]  ------>  [Phase 2: Sear Beef]  ------>  [Phase 3: Cook Veggies]  ------>  [Phase 4: Combine & Sizzle]
   (20-30 Mins)                  (5-6 Mins)                     (4-5 Mins)                     (1 Min)
Phase 1: Marinate the Beef (Time: 20 – 30 Minutes)
-
In a medium mixing bowl or a heavy-duty zip-top plastic bag, combine all the marinade ingredients (olive oil, fresh lime juice, minced garlic, ground cumin, chili powder, smoked paprika, dried oregano, salt, and black pepper).
-
Whisk vigorously until the oil, citrus, and spices emulsify into a fragrant, cohesive liquid.
-
Submerge your thinly sliced beef strips into the marinade. Use your hands to massage the meat thoroughly, ensuring every square inch of the steak is coated.
-
Seal the bag or cover the bowl and let it rest at room temperature for 20 to 30 minutes.
-
Expert Note: If you want to prep ahead, you can store the marinating meat in the refrigerator for up to 2 hours. Do not exceed 2 hours; the high acid content of the lime juice will begin to chemically “cook” and break down the meat’s structure, turning the texture mushy rather than tender.
-
Phase 2: The High-Heat Sear (Time: 5 – 6 Minutes)
-
Place a large cast-iron skillet (sartenada) or a heavy-bottomed stainless steel pan over your stovetop element and turn the heat to maximum. The pan must become smoking hot before any food touches it. This extreme heat is the secret to developing a gorgeous brown crust without overcooking the interior.
-
Add exactly 1 tablespoon of your cooking oil to the hot skillet, swirling it quickly to coat the entire surface.
-
Using kitchen tongs, lift the beef strips from the marinade, shaking off any excess liquid pooling at the bottom. Carefully lay the beef strips into the skillet in a flat, single layer.
-
Crucial Rule: If your skillet is small, cook the beef in batches. Crowding the pan drops the temperature instantly, causing the meat to steam and boil in its own juices rather than sear. Steamed beef turns gray and tough.
-
Leave the meat completely undisturbed for 2 to 3 minutes to allow a deeply caramelized, dark brown crust to form.
-
Flip the strips over and sear the second side for another 2 to 3 minutes. We want the beef cooked to a perfect medium doneness to preserve its internal juices.
-
Immediately remove the beef from the skillet and transfer it to a warm plate. Cover it loosely with aluminum foil to rest, allowing the internal juices to redistribute evenly through the meat fibers.
Phase 3: Sautéing the Caramelized Vegetables (Time: 4 – 5 Minutes)
-
Keep the skillet over medium-high heat. Do not clean or wipe the pan! The dark bits stuck to the bottom (called the fond) are packed with concentrated beef and spice flavor that we want to transfer to our vegetables.
-
Pour the second tablespoon of oil directly into the hot pan.
-
Toss in your sliced bell peppers and onions all at once.
-
Sauté the vegetables continuously using a wooden spoon or spatula. Use the moisture from the vegetables to actively scrape up all those delicious, browned bits from the bottom of the pan.
-
Cook for 4 to 5 minutes until the onions turn translucent and slightly sweet, and the peppers become tender-crisp—meaning they are pliable and soft on the outside but still retain a satisfying bite in the center, accented by beautiful charred edges.
Phase 4: The Final Sizzle and Assembly (Time: 1 Minute)
-
Slide the rested beef strips along with every drop of savory meat juice accumulated on the plate back into the skillet directly over the hot vegetables.
-
Toss everything together rapidly for about 60 seconds until the beef and vegetables are completely integrated and piping hot.
-
Turn off the heat entirely. Take half a fresh lime and squeeze the juice directly over the skillet. It will hit the hot iron, creating a magnificent burst of steam and that signature restaurant sizzle while cutting through the richness with a bright, clean finish.
-
Bring the skillet directly to the table on a heat-proof trivet to serve immediately.
Part 4: Building the Perfect Taco & Side Dishes
Fajitas are an experiential meal meant to be customized. To complement your sizzling skillet, arrange these essential components across your table:
1. Warm Tortillas
Whether you prefer flour tortillas (the sturdy Tex-Mex standard that handles heavy fillings easily) or corn tortillas (for a rustic, classic flavor), they must be served warm. Warm them for a few seconds on a dry, hot skillet until pliable, or wrap a stack in a damp paper towel and microwave for 20 seconds. Store them inside a covered tortilla warmer or clean kitchen towel.
2. The Traditional Toppings Matrix
To create the perfect balance between hot, smoky steak and cool, refreshing contrasts, provide these four bowls:
-
Pico de Gallo: A crisp, raw salsa of diced tomatoes, white onions, fresh cilantro, minced jalapeños, and lime juice. It adds an essential refreshing acidity.
-
Guacamole: A rich, buttery mash of ripe avocados, sea salt, lime, and cilantro that provides a smooth, luxurious mouthfeel to bind the taco components together.
-
Sour Cream: A dollop of cool, tangy Mexican crema or sour cream acts as an excellent cooling agent against the warm spices.
-
Shredded Cheese: A blend of sharp cheddar, Monterey Jack, or a Mexican blend that melts effortlessly when tucked against the hot strips of beef.
Nutritional Estimation (Per Serving)
For those monitoring macros or tracking calories, here is an approximate nutritional breakdown for a single serving of the beef and vegetable skillet mixture (excluding tortillas and toppings):
| Nutrient | Amount Per Serving |
| Calories | 320 kcal |
| Protein | 35 g |
| Total Fat | 16 g |
| Saturated Fat | 4 g |
| Total Carbohydrates | 9 g |
| Dietary Fiber | 3 g |
| Sugars | 4 g |
Pro-Tips and Advanced Kitchen Hacks
Elevate your fajita game from great to legendary with these insider secrets used by professional chefs:
The Showstopping Sizzle Secret: If you want to replicate that dramatic restaurant performance where the skillet arrives at the table smoking and sizzling wildly, save a teaspoon of your marinade or mix a teaspoon of lime juice with a few drops of oil. Right before walking the skillet to the dining table, pour it into the edge of the screaming hot pan.
Natural Tenderizing Alternatives: If you happen to purchase a thicker or slightly tougher grade of meat, add 1-2 tablespoons of fresh, raw pineapple juice to your marinade. Pineapple contains bromelain, a powerful natural enzyme that breaks down tough connective tissue rapidly. Warning: Do not marinate with pineapple juice for more than 45 minutes, or the meat will lose all its structural integrity.
Vegetable Modifications: Feel free to expand your skillet by adding sliced cremini mushrooms, sweet corn kernels, or sliced fresh jalapeños alongside the bell peppers to inject extra earthy or spicy flavor notes.
FAQ
What is the best steak for Beef Fajita Skillet?
Skirt steak is the traditional choice because of its rich flavor, while flank steak is another excellent option that becomes tender when sliced against the grain.
Can I make Beef Fajita Skillet ahead of time?
Yes. Marinate the beef for up to 2 hours and cook everything just before serving for the best texture.
How do I keep fajita steak tender?
Cook the steak over very high heat, avoid overcooking, let it rest for several minutes, and always slice it against the grain.
Can I freeze Beef Fajita Skillet?
Yes. Store cooked fajitas in an airtight container for up to 3 months. Thaw overnight in the refrigerator before reheating.
Conclusion
This Beef Fajita Skillet is one of the easiest Tex Mex dinners you can make. With tender steak, fresh vegetables, and a smoky homemade marinade, this Beef Fajita Skillet is guaranteed to become a family favorite.
This will bring the keyword density close to the recommended range without keyword stuffing.